Pages

Saturday, 14 September 2013

Mississippi Mud Pie

My latest endeavour was a recipe that I have had my eye for a while. This called for an ingredient that I have never used before: chocolate extract. I had never come across it before in my baking so far, so I was intrigued at a recipe that included it. I found the recipe in the Rosie's Pantry Baking book and it seemed like an easy enough task to make this pie.


First task was getting all the ingredients together:

Pastry -
  • 225g/8oz plain flour, plus extra for dusting
  • 2 tbsp coca powder
  • 150g/51/2oz unsalted butter
  • 2 tbsp caster sugar
  • 1-2 tbsp cold water

Filling -
  • 175g/6oz unsalted butter
  • 350g/12oz brown sugar
  • 4 eggs, lightly beaten
  • 4 tbsp cocoa powder
  • 150g/51/2oz plain chocolate
  • 300ml/10 fl oz single cream
  • 1 tsp chocolate extract

To decorate -
  • 450ml/15 fl oz double cream, whipped
  • Chocolate flakes and curls


Lots of lovely ingredients.


First I made up the pastry. I started by sifting together the flour and the cocoa powder.


Flour and cocoa powder.


Then I rubbed in the butter until the mixture looked like fine breadcrumbs.


Butter.


Then the sugar was stirred in, followed by the cold water.


Pastry nearly there.


This was all mixed together to create a soft dough, which was wrapped in clingfilm and left to chill in the fridge for at least 15 minutes.


Mmmm, chocolate pastry.


The dough was then rolled out on a flour- and cocoa powder-covered board, before being pressed into a 23cm/9 inch tart tin.


Pre-blind-bake.


The pastry was first blind-baked (lined with baking paper and filled with baking beans) at 190°C  for 15 minutes with the baking beans, and then for 10 minutes uncovered. Once the pastry case was out of the oven, the oven temperature was reduced to 160°C.


Baked pastry.


As the pastry was cooling, I made a start on the filling. This was made by beating the brown sugar and the butter together.


Sugar and butter.


Then the eggs and the cocoa powder were gradually beaten into the mixture.


Adding the eggs and cocoa powder.


Whilst the eggs and cocoa powder were being beaten in, I was melting the plain chocolate, which was also then added in to the filling mixture.


Adding the melted chocolate.


After the melted chocolate was added, the single cream and the chocolate extract were beaten in, and this was then poured into the pastry case.


Ready for the oven.


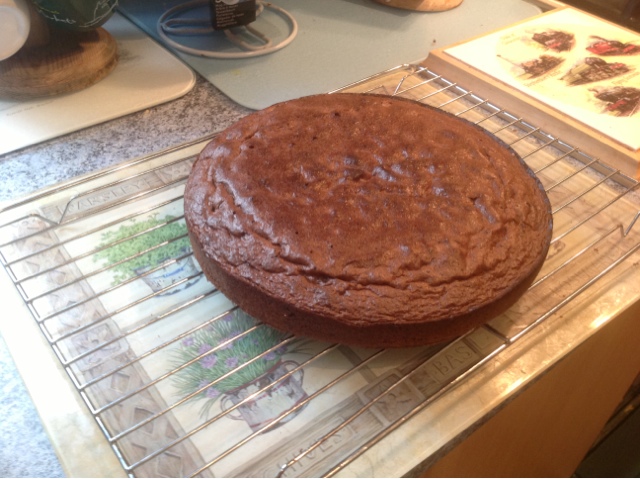
The pie was then baked in the oven for 45 minutes at 160°C, until the filling was just set.


Nicely baked.


One thing I will mention is that the recipe I used made double the amount of filling that was necessary. Unwilling to waste/throw out such a lovely filling, I poured half the mixture into the large pastry case, and saved the other half. Whilst the first pie was baking, I quickly made another batch of pastry, which I used to line a ceramic pie dish and two tartlet cases. The remaining filling was then divided up between the three pastry cases.


Mississippi Mud Tartlets.


Once the filling had cooled down completely, the whipped cream was added on top of the pie.


Adding the whipped cream.


The whipped cream was then decorated with plain chocolate flakes and curls. The decoration was the same for both of the large pies, but the small pies had only a small tablespoon's worth of whipped cream on top, and no extra chocolate.


Garnished with chocolate.


Pie for Miss Sarah and family.


I took the first pie into work, where it went down a storm with everyone. One of my colleagues even claimed that it was her favourite of my baking projects yet! I was very pleased indeed with the feedback.

The second pie was taken to Miss Sarah's house, and was much appreciated by Miss Sarah and her parents.


Ready to eat!


Messy but good.


Nice cross-section slice.


The pie was absolutely lovely. It was nowhere near as sweet as I thought it would be; I think the use of brown sugar rather than caster sugar meant that the sweetness was limited somewhat. The whipped cream was also unsweetend, which meant that there wasn't a total overload of sugar. The pastry was also not too sugary or sweet.

I can definitely recommend this recipe. It was relatively easy to make, and the results were excellent, and very much appreciated by my colleagues and friends.

Beckie.

Monday, 2 September 2013

Stripy Cake

Apologies for the long delay between posts. I have been dealing with various PhD things that have rather taken up my time recently. I did, however, have a chance to try out another cake that I have been wanting to try for a while. This involved another baking session with Miss Sarah (a most excellent baking companion, I might add), and was a fairly ambitious project in some respects, for we had decided to make a stripy cake.  For this cake, we chose the relatively straight-forward method of baking four separate cake layers of different colours. This was not so much difficult as time-consuming and a little complicated.

Miss Sarah and I decided that a simple vanilla sponge cake would be the best cake style to use for this project. We made the mix to the equivalent of two sponge cakes.

Ingredients:
Sponge - 
  • 350g butter, at room temperature
  • 350g caster sugar
  • 6 eggs
  • 350g self-raising flour
  • 1/2 tsp vanilla extract
  • Pinch of salt
 Buttercream (double required for the filling and the covering) - 
  • 140g/5oz butter, softened
  • 280g/10oz icing sugar
  • 1-2 tbsp milk
  • few drops vanilla extract


First we set up four 9-inch springform cake tins, greasing them with cake release spray, and then lining the bases with baking paper. The oven was then preheated to 180°C/350°F/Gas Mark 4.


Next the butter and sugar were beaten together with a hand-held electric mixer.


Ah, that heavenly mix of butter and sugar.


Then each egg was added one at a time, and beaten in to the mixture.


Adding the eggs one at a time.


Once all the eggs were beaten in, the vanilla was mixed in, and then the flour and salt were sifted together, and gently folded into the cake mixture.


Miss Sarah folding in the flour oh-so-carefully.


This mixture was then divided between four bowls, and each had a different food colouring (green, red, yellow, and blue) added to it.  Each bowlful was then poured into a cake tin, and these were then baked in the oven for twenty minutes each until they were fully baked.


Soooooo pretty!


Each layer was set aside to be cooled (the blue layer a source of some amusement, as we were both convinced that the swirls from the food colouring presented the image of a dinosaur skull).


First layers ready.


T-Rex skull maybe?


Once cooled, the layers were ready to be put together. For this, a simple vanilla buttercream was made by mixing together the butter and icing sugar, and then mixing in the milk and vanilla.


Mmmmm, buttercream.


Each layer of the cake was topped with some of the buttercream, before the next layer was carefully placed on top.


On goes the first round of buttercream.


Carefully placed blue layer.


Red and green layers.


Messy but fun.


The completed cake tower was quite a sight, although the outside of each layer masked the true colours inside rather well, making the cake appear to have layers of various shades of brown.


Not looking too pretty at the moment, but a whole load of buttercream will deal with that.


Then it was time to cover the cake, which required another batch of the buttercream. Once the cake was completely covered, dots of food colouring were added to the top.


Colourful dots.


The food colouring was then blended together to make a vague approximation of decoration.


'Interesting' decoration...


The first cut was the most nerve-wracking, for until we cut into it we could not be entirely sure that the various layers had worked well.


It worked! Phew!


I am pleased to report that we had a success on our hands. The different layers and colours were very clearly defined, and worked very well together.


Beautiful!


Nice layers.


Stripy cake and a cup of tea - lovely!


When I tried out the recipe again, I made some small alterations. Two of the layers (the blue and green) were the vanilla sponge, but the other two (the red and yellow) were honey-flavoured sponges. I also decorated the top of the cake with small chocolate dots instead of food colouring. It did make for a very pretty cake.


Improving on the original design with chocolate dots.


Very cute, I think.


The only quibble I had with this version was that the layers were not uniform in size, but that is merely a cosmetic issue. The cake tasted beautiful, with the honey and vanilla flavours combining well. It was certainly popular with my work colleagues.


Proving popular at work.


The stripy cake was definitely a success, and a recipe that I shall be experimenting with a great deal in the future. The aim is to at some stage make a full rainbow cake, all seven layers of it.

Beckie.

Tuesday, 6 August 2013

Chocolate Truffle Torte

Last week was my lovely sister's birthday, so I decided that as my baking skills have developed quite well I should have a go at making her a birthday cake. Not just any birthday cake though, I decided to make an attempt at a Chocolate Truffle Torte, a recipe I found in a great book -  'Rosie's Pantry: Baking, a collection of essential recipes'. My lovely friend over at Orchard House Living had given me this book a couple of months ago, and I finally got round to trying out one of the recipes. Unfortunately, the 'Rosie's Pantry' range (previously sold by Boots) seems to have been discontinued, and I can only find the book on eBay now

I had one sort-of practise run the week before my sister's birthday, where I made the torte for the very first time. It turned out very well, was very delicious (so much lovely chocolate!), but I felt that the cake base was a tad thin for my liking. Therefore I made some adjustments to the recipe when I made the birthday cake.

Ingredients (serves 10 apparently):
For the cake - 
  • Butter, for greasing (I used the cake release spray instead again).
  • 110g/4oz golden caster sugar (original recipe calls for 55g/2oz)
  • 4 eggs (original recipe - 2 eggs)
  • 50g/2oz plain flour (original recipe - 25g/1oz)
  • 50g/2oz cocoa powder (original recipe - 25g/1oz)
  • 50ml/2fl.oz cold strong black coffee (I used espresso powder)
  • 2 tbsp Brandy

For the topping - 
  • 600ml/20fl.oz whipping cream
  • 425g/15oz plain chocolate, melted and cooled
  • Icing sugar, to decorate
  • Cocoa powder, to decorate


First, I lined the base of a 23cm/9inch springform cake tin with baking paper, before greasing the sides with the cake release spray. I then set the oven to 220°C/425°F/Gas Mark 7.


Tin prepped, along with the cocoa powder and flour.


Next I put the eggs and the caster sugar into a heat-proof bowl and set it over a pan of simmering water. I whisked the eggs and sugar together until pale and mousse-like.


Moussey goodness.


I then gently folded the flour and cocoa powder into the moussey batter, and then poured it into the prepared cake tin.


Adding the cocoa powder and flour.


Batter ready for the oven.


The batter was then baked in preheated the oven for ten minutes, until it was risen and firm to the touch. It was then transferred to a wire rack to cool.


Ooh, cake.


Looking good!


The coffee and brandy were mixed together to create a mixture that smelled incredible. Once the cake had cooled sufficiently, it was put back into the newly-washed tin, and then was brushed with the coffee and brandy mixture.


Ready for brandy and coffee.


A suitably coffee-and-brandy-drenched sponge.


Next, I had to make the yummy topping that goes on top of the sponge. This involved firstly melting all the chocolate in a heat-proof bowl over a pan of simmering water. Once it was fully melted, I set it aside to cool slightly.


Delicious, melted chocolate.


Next, I poured the cream into a bowl and whipped it until it formed very soft peaks.


That's a lot of whipped cream. Yum!


Then I gently folded the melted chocolate into the whipped cream, and then poured the mixture over the sponge. The torte was then placed in the refrigerator to chill for five hours and the set.


Lovely marbling.


Looking good.


Ready for the fridge.


Once the torte had chilled and set, it was carefully removed from the springform tin. A small amount of the chocolate and cream mixture stuck to the sides of the tin, but not enough to ruin the look of the torte. I did, however, smooth out the sides of the torte a little.


Chilled, set, and ready for decoration.


Then it was time to decorate the torte. I started by sifting cocoa powder over the surface of the torte, before placing three strips of waxed card on top of the torte as a mask. With this mask prepared, I then sifted icing sugar over the torte to create a striped pattern.


Layer of cocoa powder nicely done.


Less-than-tidy but still decent-ish stripes.


Then it was time for the final flourish - the candles!


Yay! Candles!


I must admit, I was quite pleased with how the torte turned out. It sat in the fridge oh-so-temptingly until my sister came over and picked it up.


Deliciousness.


Of course, we had to try some of it immediately, just to make sure it was acceptable. It seemed to pas the sister test, so that's good.


It didn't take us long to try some.


Yet again, I seem to have found a recipe that I can only highly recommend. The torte is delicious, and not too sweet, as it only uses plain chocolate. The sponge is wonderfully light, and with the coffee and brandy has a delightful flavour. The main thing, of course, is that my sister loved it, which was the whole point really.

Another very successful recipe!

Beckie.