Last week was my lovely sister's birthday, so I decided that as
my baking skills have developed quite well I should have a go at making
her a birthday cake. Not just any birthday cake though, I decided to
make an attempt at a Chocolate Truffle Torte, a recipe I found in a great book - 'Rosie's Pantry: Baking, a collection of essential recipes'. My lovely friend over at Orchard House Living had given me this book a couple of months ago, and I finally got round to trying out one of the recipes. Unfortunately, the 'Rosie's Pantry' range (previously sold by Boots) seems to have been discontinued, and I can only find the book on eBay now
I had one sort-of practise run the week before my sister's birthday, where I made the torte for the very first time. It turned out very well, was very delicious (so much lovely chocolate!), but I felt that the cake base was a tad thin for my liking. Therefore I made some adjustments to the recipe when I made the birthday cake.
Ingredients (serves 10 apparently):
For the cake -
For the topping -
I had one sort-of practise run the week before my sister's birthday, where I made the torte for the very first time. It turned out very well, was very delicious (so much lovely chocolate!), but I felt that the cake base was a tad thin for my liking. Therefore I made some adjustments to the recipe when I made the birthday cake.
Ingredients (serves 10 apparently):
For the cake -
- Butter, for greasing (I used the cake release spray instead again).
- 110g/4oz golden caster sugar (original recipe calls for 55g/2oz)
- 4 eggs (original recipe - 2 eggs)
- 50g/2oz plain flour (original recipe - 25g/1oz)
- 50g/2oz cocoa powder (original recipe - 25g/1oz)
- 50ml/2fl.oz cold strong black coffee (I used espresso powder)
- 2 tbsp Brandy
For the topping -
- 600ml/20fl.oz whipping cream
- 425g/15oz plain chocolate, melted and cooled
- Icing sugar, to decorate
- Cocoa powder, to decorate
First, I lined the base of a 23cm/9inch springform cake tin with baking paper, before greasing the sides with the cake release spray. I then set the oven to 220°C/425°F/Gas Mark 7.
 |
| Tin prepped, along with the cocoa powder and flour. |
Next I put the eggs and the caster sugar into a heat-proof bowl and set it over a pan of simmering water. I whisked the eggs and sugar together until pale and mousse-like.
 |
| Moussey goodness. |
I then gently folded the flour and cocoa powder into the moussey batter, and then poured it into the prepared cake tin.
 |
| Adding the cocoa powder and flour. |
 |
| Batter ready for the oven. |
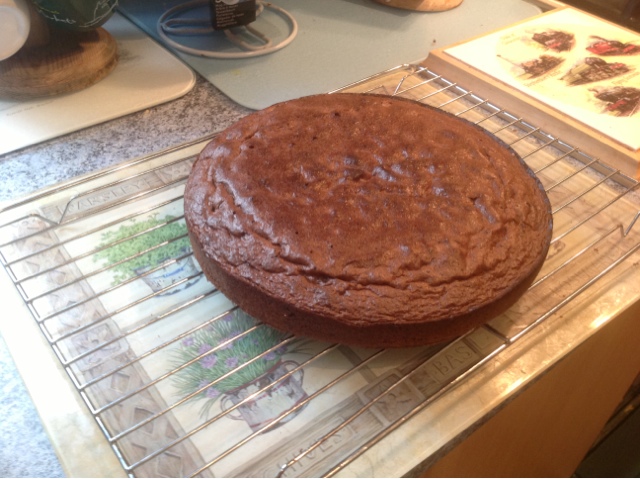
The batter was then baked in preheated the oven for ten minutes, until it was risen and firm to the touch. It was then transferred to a wire rack to cool.
 |
| Ooh, cake. |
 |
| Looking good! |
The coffee and brandy were mixed together to create a mixture that smelled incredible. Once the cake had cooled sufficiently, it was put back into the newly-washed tin, and then was brushed with the coffee and brandy mixture.
 |
| Ready for brandy and coffee. |
 |
| A suitably coffee-and-brandy-drenched sponge. |
Next, I had to make the yummy topping that goes on top of the sponge. This involved firstly melting all the chocolate in a heat-proof bowl over a pan of simmering water. Once it was fully melted, I set it aside to cool slightly.
 |
| Delicious, melted chocolate. |
Next, I poured the cream into a bowl and whipped it until it formed very soft peaks.
 |
| That's a lot of whipped cream. Yum! |
Then I gently folded the melted chocolate into the whipped cream, and then poured the mixture over the sponge. The torte was then placed in the refrigerator to chill for five hours and the set.
 |
| Lovely marbling. |
 |
| Looking good. |
 |
| Ready for the fridge. |
Once the torte had chilled and set, it was carefully removed from the springform tin. A small amount of the chocolate and cream mixture stuck to the sides of the tin, but not enough to ruin the look of the torte. I did, however, smooth out the sides of the torte a little.
 |
| Chilled, set, and ready for decoration. |
Then it was time to decorate the torte. I started by sifting cocoa powder over the surface of the torte, before placing three strips of waxed card on top of the torte as a mask. With this mask prepared, I then sifted icing sugar over the torte to create a striped pattern.
 |
| Layer of cocoa powder nicely done. |
 |
| Less-than-tidy but still decent-ish stripes. |
Then it was time for the final flourish - the candles!
 |
| Yay! Candles! |
I must admit, I was quite pleased with how the torte turned out. It sat in the fridge oh-so-temptingly until my sister came over and picked it up.
 |
| Deliciousness. |
Of course, we had to try some of it immediately, just to make sure it was acceptable. It seemed to pas the sister test, so that's good.
 |
| It didn't take us long to try some. |
Yet again, I seem to have found a recipe that I can only highly recommend. The torte is delicious, and not too sweet, as it only uses plain chocolate. The sponge is wonderfully light, and with the coffee and brandy has a delightful flavour. The main thing, of course, is that my sister loved it, which was the whole point really.
Another very successful recipe!
Beckie.


